
The Bunnings Workshop community can help with your home improvement projects.
- Bunnings Workshop
- >
- Discussion
- >
- Living and Bedroom
- >
- Re: How to best achieve a driftwood look...
How to best achieve a driftwood look on this wooden tabletop?
- Subscribe to RSS Feed
- Mark Topic as New
- Mark Topic as Read
- Float this Topic for Current User
- Bookmark
- Subscribe
- Mute
- Printer Friendly Page
Share
- Mark as New
- Bookmark
- Subscribe
- Mute
- Subscribe to RSS Feed
- Highlight
- Report Inappropriate Content
How to best achieve a driftwood look on this wooden tabletop?
Hello DIYers!
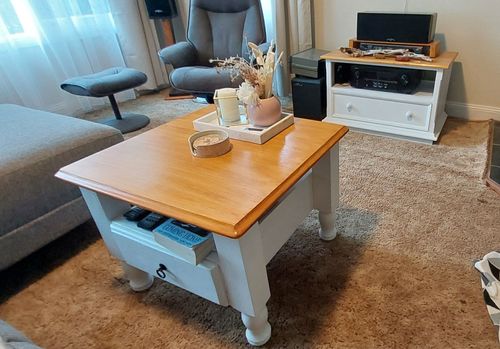
My partner and I picked up a full wood kitchen table with base and have been working on it.
Below are some pictures of what we've done. With the base we've painted it matte black and it's come up a treat. With the top however we're at a bit of an impass.
We've sanded the top back to bare wood and were wanting to make it have a driftwood look with the grain of the wood still visible. We tested a patch with liming white but didn't get the result we were looking for.
We suspect that the wood itself doesn't lend itself to this sort of look and we may need to rethink our approach and looking for advice on how we could achieve this, or what would be suitable.
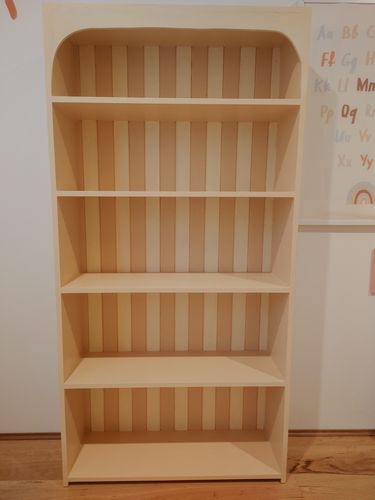
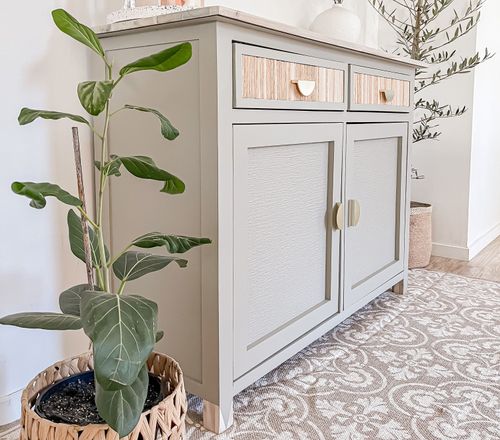
Below is an example of a colour sample we found at Bunnings that demonstrates the look we're going for. I also suspect we haven't sanded enough of the wood since from looking at the underside (picture below) you can see where it was untreated where the legs go vs what we've sanded it to.


Solved! See most helpful response
- Mark as New
- Bookmark
- Subscribe
- Mute
- Subscribe to RSS Feed
- Highlight
- Report Inappropriate Content
Re: How to best achieve a driftwood look on this wooden tabletop?
Hi @dchur,
I've been actually doing some weathering of wood lately. A weathered look to timber is established through colouring and texture. Where the timber has weathered away, it fills with grime and becomes darker, and the exposed remains lighter. You have a flat surface, so it's going to be hard to achieve a convincing weathered look without distressing the surface. The basic method of adding a weathered look involves distressing the surface with a wire brush to remove some of the softer timber. You'd then mix up a dirty wash of brown paint and a little black and brush it over the surface. It will fill the valleys you've created, and after it's dry, you can lightly sand back the surface to remove it from the higher points. With your white paint, you want to apply it fairly dry so it doesn't seek down and cover the dirty wash. Apply the white lightly and build it up if need be, with some light greys in different areas. Timber is organic and is compromised on many different colours, so to mimic the weathered look, you need to do different layers, stipple and apply light strokes.
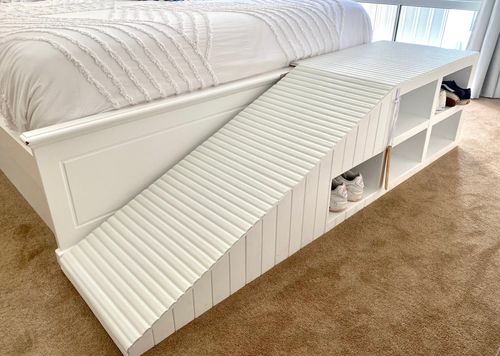
As an example, I've very quickly done a basic weathering on some Pine for you. I distressed the timber, applied a black/brown wash, sanded slightly, and then feathered a white coat over it. You can see how we've mimicked the grain of the timber and how there is depth to the colours. With a bit more work, it would be very close to the sample you've seen.
I'm keen to provide further assistance. Please let me know if you have questions.
Mitchell

- Mark as New
- Bookmark
- Subscribe
- Mute
- Subscribe to RSS Feed
- Highlight
- Report Inappropriate Content
Re: How to best achieve a driftwood look on this wooden tabletop?
Hi @MitchellMc ,
Thanks for your suggestions and example, much appreciated. I wouldn't have thought to distress the timber like this but it makes perfect sense.
Apologies for all the seemingly basic questions but this isn't my area of expertise and I'm unsure of a few things.
1) What went into the black/brown wash? Just a mixture of the two colours of paint?
2) We're unsure what the wood is that we have and how it will respond to this treatment but I guess we just give it a go?
3) Since we're using paints here for the black/brown and white, I assume we need to clear coat it at the end?
Thank you kindly.
- Mark as New
- Bookmark
- Subscribe
- Mute
- Subscribe to RSS Feed
- Highlight
- Report Inappropriate Content
Re: How to best achieve a driftwood look on this wooden tabletop?
Hi @dchur,
A couple of drops of black and brown paint were watered down significantly. Perhaps the two drops in 50-100ml. Try experimenting with a spare bit of timber to get the intensity right for you.
It looks like Pine to me, the same as my sample. You could try it on the underside of the table. I have almost the exact same table and can't remember the last time I looked under it. Noone's going to see a couple of experiments.
It's would be best to clearcoat it for protection. You might like to go with a matt look varnish as a gloss varnish will kind of take away from your weathered look. Once again, though, it's up to you what look you're going for. I'd suggest using Cabots Cabothane in the water-based.
Mitchell
- Mark as New
- Bookmark
- Subscribe
- Mute
- Subscribe to RSS Feed
- Highlight
- Report Inappropriate Content
Re: How to best achieve a driftwood look on this wooden tabletop?
@MitchellMc thank you.
Agree with experimenting under the table, that's where the liming white was done too so we'll give that a go. Thanks for the tips and will report back with what we end up with.
- Mark as New
- Bookmark
- Subscribe
- Mute
- Subscribe to RSS Feed
- Highlight
- Report Inappropriate Content
Re: How to best achieve a driftwood look on this wooden tabletop?
@MitchellMc we did some experiments with the underside of the table and couldn't land on something we liked, so we decided just to sand it back and coat it with a water base polyurethane (satin).
We sanded it back using 80 grit, then 100, then to 240 before applying three coats of the poly.
The first coat was applied with a brush and left some brush marks so we opted for a mohair roller for the 2nd and 3rd. Between first and second coat we sanding lighting using 220, between 2nd and 3rd we used 600.
The final result is less than desirable:
1) There is bubbling, this was from the final coat of poly only
2) Seems to be some light scratching in some parts, I think this is from the sanding between coats where we used 220 initially instead of 600
3) Some haziness in some areas of the wood
I assume we need to sand back to bare wood and start again, but my question is how do we prevent the bubbling from happening again, and the haziness? The scratches i'm chalking up to us using 220 instead of 600 between coats but keen on your thoughts.


- Mark as New
- Bookmark
- Subscribe
- Mute
- Subscribe to RSS Feed
- Highlight
- Report Inappropriate Content
Re: How to best achieve a driftwood look on this wooden tabletop?
Hi @dchur
There are a few possible causes for bubbles to appear in the polyurethane. First, the polyurethane was shaken and not stirred, shaking polyurethane is not advised as it traps air bubbles, it must only be stirred for at least 5 minutes to mix it properly.
Second, the first coat applied was too thick. When polyurethane is applied to timber it gets absorbed by the timber and this releases air trapped in the wood. When the second coat is applied, it will trap the air in the second coat as not enough time has passed to let the air out of the first coat. This is why the first coat is often diluted to allow the air to escape and makes it easier for the wood to absorb the polyurethane.
Third, cold temperatures can also cause bubbles to form in the polyurethane, again this happens when the coat applied is too thick.
I recommend sanding the surface again, and once the surface is prepared, apply a coat of diluted polyurethane. Allow the first coat to fully cure and harden. I suggest using a Trojan 320 Grit Jumbo Sanding Sponge to achieve a smooth finish. Your goal is to lightly sand the surface to remove any blemishes. Wipe the top off with a damp rag to remove all the sanding dust. Allow the table to air dry and then wipe down with a UNi-PRO 18 x 36" Painters Tack Cloth.
Please remember to keep the tack cloth in a sealed sandwich bag so it does not dry out.
Use the diluted polyurethane for the second coat and repeat the process. Make sure that the second coat is fully cured before you apply the third coat. The third coat can be applied at full strength at this point. It's critical that the table be placed in an environment where it will not be exposed to very cold temperatures.
Here is a handy step-by-step guide: How to restore wooden furniture
If you have any other questions we can help with, please let us know.
Eric
- Mark as New
- Bookmark
- Subscribe
- Mute
- Subscribe to RSS Feed
- Highlight
- Report Inappropriate Content
Re: How to best achieve a driftwood look on this wooden tabletop?
Thanks Eric.
I do believe you're onto something with the cold temperature. We did it on a day in the shade last week that was about 19 degrees and whilst we let it dry for 2 hours between coats, the final coat was at 3:30PM so well into the cooler afternoon. The bubbles appeared instantly in the final coat and wasn't a result of shaking the tin (I stirred it) so I'll chalk it up to that and learn my lesson.
We plan to leave it for a week and see how the table goes with day to day use before sanding it back and starting again. If it was just the bubbles I wouldn't be too worried since they're only unsightly in certain lighting conditions, but the addition of the scratches from lower grit sand paper are upsetting me so we will strip it back and start again.
Thanks for your tips re dilutting, we hadn't considered that.
One final question is that for the final coat we used a NEW tin of the poly. it was the exact same brand and type (water based cabbots poly, satin) however I did notice that there were little "floaties" in the tin. Almost like white blobs that did go away with stirring but still remained at some degree in the final product. I wonder if this contributed too since the bubbles only formed from the coat applied by this new tin.
- Mark as New
- Bookmark
- Subscribe
- Mute
- Subscribe to RSS Feed
- Highlight
- Report Inappropriate Content
Re: How to best achieve a driftwood look on this wooden tabletop?
Hi @dchur
The "floaties" as you refer to them are semi solid portions of the polyurethan. These impurities sometimes get mixed in with the product as it is being prepared. I don't think it would have contributed to the bubbles. Prolonged stirring will often times break them down, but it is possible to strain the polyurethane into another container. Just keep in mind that you'll need to wait for the air bubbles to go away after straining it.
If you need further assistance, please let me know.
Eric
Why join the Bunnings Workshop community?
Workshop is a friendly place to learn, get ideas and find inspiration for your home improvement projects
You might also like
We would love to help with your project.
Join the Bunnings Workshop community today to ask questions and get advice.