
The Bunnings Workshop community can help with your home improvement projects.
- Bunnings Workshop
- >
- Discussion
- >
- Garden
- >
- Re: Small gabion retaining wall
Small gabion retaining wall
- Subscribe to RSS Feed
- Mark Topic as New
- Mark Topic as Read
- Float this Topic for Current User
- Bookmark
- Subscribe
- Mute
- Printer Friendly Page
Share
- Mark as New
- Bookmark
- Subscribe
- Mute
- Subscribe to RSS Feed
- Highlight
- Report Inappropriate Content
Small gabion retaining wall

After having the sewage done and redoing my stormwater pipes (they had compacted over the years in multiple areas) the steps I originally had were in a state of needing to be replaced or a new path created. I decided on a new path, so the gap had to be filled. I used precut gabion walls or two different sizes to do the job. It was very easy to do.
Materials
Medium Gabion Basket 650*300*150
Tools
Tape measure
Mallet
Pliers
Long nose pliers
Ratchet straps
Spirit Level
Hardy wheelbarrow
Cold chisel
Pund hammer (Baby sledge hammer)
Steps
Step 1
I had a mess to clean up. I had a stormwater pipe under the gravel by around 5cm - 10cm. There was no foundation to the existing steps/retaining wall. I did not want to add something so permanent that if I replace the whole wall it would be a pain to pull out.

To the left is where I had to dig the trench for the stormwater pipe replacement. (will post that project sometime) You can see an inspection point I put in just in case. This will eventually have a large PVC disk around it and a paver over the top. Still haven't done that part even today.

As you can see there is no foundation to any of the steps. In fact I pulled out copper logs, bricks, random large stones when i was digging the trench. There was no easy way I could see to repair the stairs and make it look professional.

Always sketch what I have in mind. It really helps solidify what can be done and also any problems tend to show up.

What I started with after getting rid of the old steps, I chiseled off the edges of concrete mortar as needed every mm of space

A large concrete paver I had from a few years ago. I will use this for mechanical protection of the stormwater pipe.

Gravel to level the area and protect the stormwater pipe. Plus give a base for the concrete slab/paver to distribute the weight of the gabion wall on


Concrete base went in perfectly, Happy with how easy it was to level it with the gravel (8mm gravel I think)
Step 2
Now to get the cages in place, One was going to be vertical and the other two horizontal. I had no leeway in spacing so wanted to fit them together before filling either cage.

Three cages all up.


Putting the cages together. They come together so easily. The spirals are pre-cut and the spirals are at the correct distance to wind on easily. My suggestion is when you purchase the basket make sure there are all the sprials needed as sometimes they fall out.

This is the smaller cage that will be vertical. So Im and joining all the pieces bar the top most so I can fit it into the space.

I had not tolerance at all, was even a little over (10mm) but thought I could get that back by slotting the cages together.

Large cage coming together. Remember when picking the cage up (once you have put it together) the spirals may want to spiral downwards and out. Easiest way to transport them is to hold the cages with outside pressure so the spirals stay in-situ. image the two long sides being pushed apart is how I carry the complete cage.

Cage is much easier to put together on a flat area.

So when I pick up the cage to place in the right spot I pick up from the spiral top side and the rear of it and slightly push them apart. It creates just enough pressure that stops the spirals running down and out.

Very happy with the placement.

Just showing the tiny edges I had to chisel to allow the cages to fit.

Cold chisel and hammer are my friends.
Step 3
Time to start filling the cages. Make sure you put in a few stay wires (front to back so the cages wont bulge. Even if they are not over full they will still bulge) Keep the nicer piece sof stone/concrete or rocks for the cafe side and put all the broken bits of bricks/whatever you have at the rear. I also would throw in smaller gravely bits to help lock in the concrete pieces.

Very happy with the placement of the cages. They fitted with a little bit of jiggling.

Overall look across the width of the yard. You can see the long horizontal line between the existing Bessa blocks. This happened when the excavator dug the trench for the sewage. and when it trundled down onto that terrace the terrace moved... No foundation and no rio between the blocks!

To show the stay wires. I put in three as the cage will be on its own and will stand out if it bulges.

Kept pace with filling either cage so they wouldn't expand into the other as I filled them with the smashed concrete path and bits.

Tools I used...

Fitting the top cage. Went in pretty easily.

Showing the gap behind the cage

One day I may re-render the Bessa blocks or just fill with ??? and paint them.
Step 4
Last stage was to backfill and also make sure soil/clay wouldn't drift through into the rocks to easily. Also never throw in stones or builders ruble. I have had to dig up so much it just causes issues later on for someone. (I found a Tooheys beer can!)

The material I used to stop the soil from seeping into the gabion baskets. It is ex upholstery material I have had stored under the house for the past 5 years at least. I have used it before and doesn't seem to rot 

The pile of clay that I had dug out is going back into the hole without the copper logs/rocks etc.

Coming together nicely.

Just showing the future line of another gabion wall.

All done for this part

The wall has been like this for two years now and hasn't moved a bit. No cracking in the base concrete and no settling of the baskets. No soil has traveled through the wall. It took two days of work to put into place (That is including removing the old steps and clearing it up)
- Mark as New
- Bookmark
- Subscribe
- Mute
- Subscribe to RSS Feed
- Highlight
- Report Inappropriate Content
Re: Small gabion retaining wall
Looks great, @Dave-1. Those cages are just so versatile.
Well done, and many thanks for sharing and including all those images; they really help paint the picture.
Mitchell
- Mark as New
- Bookmark
- Subscribe
- Mute
- Subscribe to RSS Feed
- Highlight
- Report Inappropriate Content
Re: Small gabion retaining wall
Hi Dave, thanks for sharing step by step, I have wanted to use a gabion wall in my backyard for a while, but wasn't sure if I could do it. I actually want it to have a curve, so not sure if that is possible, but great to see it isn't as hard as I had envisioned.
- Mark as New
- Bookmark
- Subscribe
- Mute
- Subscribe to RSS Feed
- Highlight
- Report Inappropriate Content
Re: Small gabion retaining wall
Afternoon @Ericmilo
I have seen curves made tho havnt tried it myself yet  As long as the spirals have a fair amount of contact through the top and bottom plates I dont see an issue. Always making sure you have enough tie wires within teh cage to stop bowing outwards.
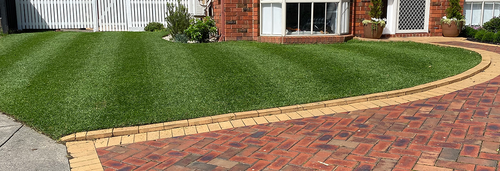
This isnt a curve but it works to hold the curved path. Gabion wall for front pathway If you just think of either a bunch of smaller cages in an ark or even go for large cage, small cage, large cage in a smooth ark.
Dave
- Mark as New
- Bookmark
- Subscribe
- Mute
- Subscribe to RSS Feed
- Highlight
- Report Inappropriate Content
Re: Small gabion retaining wall
Thanks Dave. I will look into it further.
Why join the Bunnings Workshop community?
Workshop is a friendly place to learn, get ideas and find inspiration for your home improvement projects
You might also like


We would love to help with your project.
Join the Bunnings Workshop community today to ask questions and get advice.