The Bunnings Workshop community can help with your home improvement projects.
- Bunnings Workshop
- >
- Featured Projects
- >
- Front entrance door renovation
Front entrance door renovation
Share
- Subscribe to RSS Feed
- Mark as New
- Mark as Read
- Bookmark
- Subscribe
- Printer Friendly Page
- Report Inappropriate Content
A front door, frame and screen door stripped and sanded back and coated with fresh paint to renew the home's entrance.

The project
You know when you start fixing up one thing and it keeps leading you to other jobs that now need to be done? This was one of those jobs.
I am replacing my handrail for the front patio. This led to the front door and door frame that had flaky paint straight down to the timber and needed to be fixed. The screen door is a by-product of the modification.
The paint has been flaking since I moved in years ago and I should have done it earlier but other projects kept turning up.
Steps
Step 1
The paint was flaking on my front door. I could use my fingernail to remove the paint and couldn't see a way of fixing it. So the paint had to come off the door. The door frame had severely flaking paint back to the timber. So this also had to go. The screen door was the old style cream door and the flyscreen mesh was perishing in places. All in all, everything needed to be brought back to spec.

I really don't know what the previous people used or even how. I haven't seen paint do this before. I really should have tackled it earlier but it was in the "too hard" basket, as I knew the whole patio needed fixing.

The paint has been peeling for thirteen years and was peeling when I bought the place.

The more I looked, the worse I realised it was.

I asked the question to the Bunnings community what colours should I redo and one of the suggestions that came back was from spray painted screen door by @homeinmelbourne. I really liked the look and also recognised my screen door style.
Step 2
I really wasn't looking forward to stripping the door. Weirdly, every time I used the paint stripper it really only removed the topmost layer of paint. Here are the main tools I used, plus a 40mm scraper and, in the end, a brass fine brush that worked wonders for removing the paint out of the grooves.

Prepped in case stuff fell on the floor.

This was just with the paint scraper without any paint stripper.

That black piece hanging in the air is actually a length of paint removed with paint stripper.

I wasn't sure I was using the paint stripper right until I saw this happen. Do small areas and wait. Don't try to do a larger area and then work through, as there is a sweet spot time-wise with the softened paint and then it starts hardening again.

Screen door trim to stop the screen door banging. It was coated in a very plastic type paint. I removed the timber strip, then sliced it with a knife down the centre of the strip and peeled it cleanly like a banana.

Screen door removed so I can scrape the paint.

Not fun. Lots of coats of paint stripper, scrape and then recoat with more paint stripper but gradually it became nicer.

What a shocker. I think there were four separate colours all up with I-don't-know-how-many coats.

The colours you find underneath. The blue was only on the inside of the panels and the panels themselves.

Pretty much removed all, but how to remove the last bits? Sand it?

I ended up using the Trojan thin brass wire brush and it worked so easily. It removed the paint from the valleys and the hard-to-remove sections. I still used the paint stripper first, then scrubbed, like you would with steel wool on a dish.

Step 3
Now came the part I was a little nervous about: replicating a project I had seen on here. I have done limited spray painting and few replacing/making flyscreens before. I debated which to do first. The white outer edge or the inner black. I chose the black first but looking back I think the outside edge first then the black would have made a cleaner job.

Taped the edge and just realised I really didn't need to as it was going to be painted over later.

Other side now.

I used undercoat on the door and the door frame. I really liked how it was coming along.

Time to do the edges.

I had been lazy and should have taped down all the joins in the paper. It was harder to tape down on the edges as I wanted the channel for the rubber strip that holds the screen in place to be black. The wriggly mesh went right up to the channel, so it was hard to get a clear distinction between the two. If I had done the white first and then the black, this wouldn't have been a problem.

Happy with the outcome though.

The door is all painted. Love how the black fools the eyes.

Step 4
Time to paint the front door and put the mesh into the screen door. Painting wasn't a problem. Mesh into the screen door was where my hesitation began. Pure nerves - but it felt like it was hanging over my head.

It felt weird painting over the timber after removing all that paint.

First coat done. My sister commented that it's a nice shade of yellow. Haha, man I hate that colour. But it really proves you need a few undercoats before the final coat. I did two undercoats and two top coats as I had the paint, anyway.

I kicked myself as I had forgotten I needed to paint the trim. It was tucked away in another room, all safe.

Time for the screen to be put in.


The instructions say cut 2cm wider than the area needed. Thankfully, I didn't as I messed up with the first run. I was using aluminium screen mesh and when I was running the wheel along to push the rubber strip into the channel, I went too hard and too many times and ripped the mesh. I was lucky I hadn't cut it.

Is there an easy way to cut a tidy edge? I did find that the cut ended up within the channel once I went over with the pushdown wheel and pushed the rubber strip all the way down into the channel. It's so good it's almost like a bought one. A few scratches but nothing I am too unhappy with. The revamp of the screen door cost approximately $80.

Final coat done. Time for the edging and the lock plates to be sorted.

Really didn't know how to clean up flaky chrome, so I left it as it is.

I spent 30-45 minutes of watching YouTube and screwing things back together, hoping I haven't managed to lose something while painting it. I finally figured it out after watching a handywoman put a screen door lock in and then she casually mentions "the kick plate pushes in the tab so it can lock". Of course, I was doing it without the door in its spot.

Step 5
Time to put it all together including the screen door trim. Yeah, was a little stressy, as I knew anything could throw out the sequence and I wanted to finish it that day.

I had purposefully left the nails in the trim to make it easier to align the timber where it was before I took it off.

Trying to figure out which piece and was it upside down or this way up.

One of the Bunnings team members had suggested metho or turps (I couldn't remember which one) to soften paint. I had black paint on the door latch and no paint stripper left. I only had turps in the house so used turps. It did make it easier to scrape the paint off.

The trim went in fairly easy. There were a few scuffs as the final coat of paint only went on two hours before. I touched them up afterwards.


Thank you Bunnings Magazine. You helped me out with fixing the height of the screen door so I could get that first screw in. I was hunting for something about 1cm thick that wouldn't matter if it got scratched or marked.
First screw in. Phew, stressy part done.

Now here is another issue I ran into. Even though I had put the trim back in the same holes, it wasn't quite right. When I pulled the screen door closed I heard a noise and stopped fast. The trim was out by about 1mm. So I had to lever it off without marking that fresh paint and then fix it in place.

Step 6
The last step was the photo op for the door. I must say I am so glad someone pointed me towards the spray painted screen door project as it's what started me off on the whole colour and what-to-do scheme.
The paint on the inside of the foyer looks shocking now that the new paint shines so bright.

Close door, locks OK, nothing sticks.

Bring on those hot summer afternoons/evenings where you want every ounce of breeze to come through the house.

Tools and materials
Materials used in the project:
- 3 x Poly paint stripper 1L
- 3 x Satin black spray paint
- 2 x Satin white spray paint
- 1 x 1Step Prep primer and undercoat
- 1 x Semi gloss white Aquanamel paint
- Sandpaper various grit
- 2m x 1.2m aluminium fly screen mesh.
Tools used in the project:
- 25mm paint scraper
- 40mm paint scraper
- Small paint brushes (two sizes)
- Brass wire brush
- Screwdrivers (flathead and Phillips head)
- Claw hammer
- Flyscreen roller.
More inspiration for your entrance project
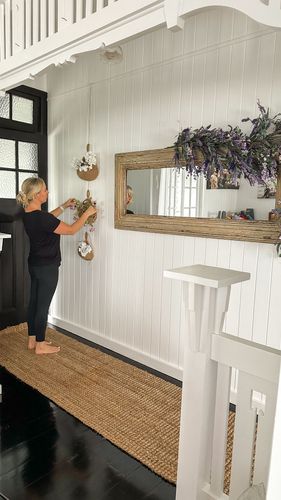
Workshop community member Andie used British Paints when completing her hallway entrance paint makeover.
.png")
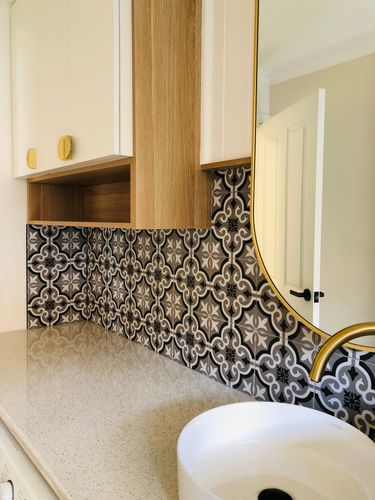
Community member homeinmelbourne used Dulux paint when completing their front door and sidelight makeover.

Check out our 10 ways to refresh your entryway and 9 ways to update your front door for more creative ideas from Bunnings Workshop community members.
Why join the Bunnings Workshop community?
Workshop is a friendly place to learn, get ideas and find inspiration for your home improvement projects