The Bunnings Workshop community can help with your home improvement projects.
- Bunnings Workshop
- >
- Featured Projects
- >
- Custom-built window seat with storage
Custom-built window seat with storage
Share
- Subscribe to RSS Feed
- Mark as New
- Mark as Read
- Bookmark
- Subscribe
- Printer Friendly Page
- Report Inappropriate Content
A new window seat used for storage, built with Pine framing and Melamine particle board.

The project
I would like to share my recent project - I am so happy with how it turned out, despite my husband (Lee) and I not doing anything like this before. It basically started as a bunch of random sketches which I presented to Lee and asked him if he could make it.
Luckily for me (and him), he said yes, and here we are. I had seen similar creations online which had provided me with some inspiration, but as the space earmarked was unique to us, we had to build it to suit. This project came about because we had a nook in the main bedroom that was pretty useless. We wanted to make it more cohesive with the rest of the room and provide some storage which we desperately needed.
We searched for some flat pack drawers which were suitable. Size was the most important element and what would fit.
The first job was to pull back the existing carpet and remove the grippers and flooring from the area, ahead of the framing.

The framing served a dual purpose. We needed to create a stable base to attach the carcasses to, but also needed to elevate them off the floor slightly. We used the blue treated Pine for this, which you can buy by the lineal metre. Our concrete subfloor was a bit brittle in places, so we plugged, screwed, and used Liquid Nails to secure in place.
.JPG")
The drawers were then built and placed on the framing before screwing down. We didn't have quite enough room, sadly, for another small set of end drawers, so we decided to make a shelf space for storage. The other three sides (one side being the drawer end) were framed out using white Melamine shelving which we cut to size.
We set the framing away from the wall to allow another piece of the timber to sit securely on top of the drawers at the back. This was done to allow us to have a stable structure to attach the timber top onto. We added some pine framing down the left-hand side of the bench seat to make sure that we had adequate room to open and close the drawers. We also used a small piece of timber along the bottom to hide the framing.

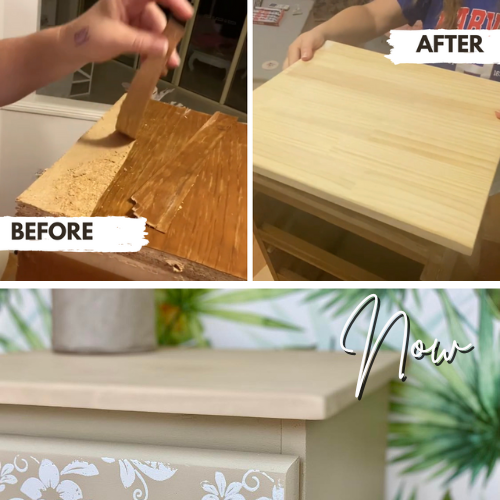
Next came the timber top. We used a Specrite Red Oak panel, which we cut down to size.
The panel was glued down, as well as using little brackets around the perimeter of the drawer carcasses. It was then given a good sand all over using an orbital sander, and some Tasmanian Oak quad moulding were placed to hide the small gaps left for expansion against the walls. The wood was then stained with Feast and Watson Liming - White.

I hope that this project inspires someone else to make use of a wasted space in their living area or bedroom. Before was a dark space with no real purpose.
Before and after


More inspiration for your indoor storage project
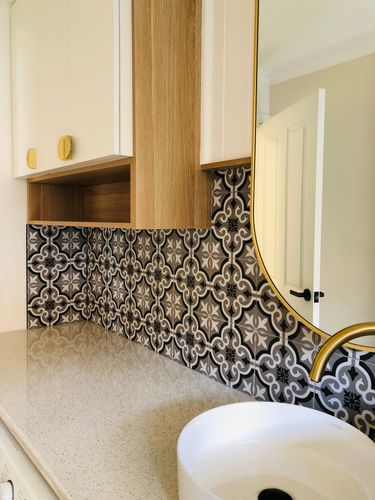
Workshop member Mariana built this window nook with seat and storage in an area that was not being used.

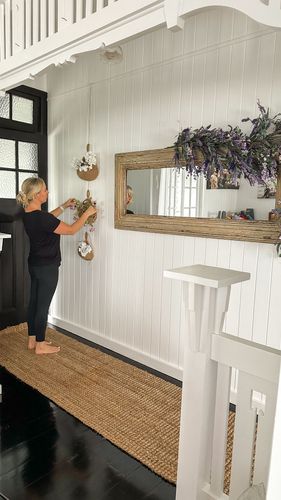
Community member Alyce maximised storage space by completing a wardrobe makeover with extra storage in her bedroom.

For more ideas, check out 5 clever ways to maximise storage.
- Mark as Read
- Mark as New
- Bookmark
- Highlight
- Report Inappropriate Content
Well done, excellent work indeed. The photos provided at various stages of the project certainly help.
- Mark as Read
- Mark as New
- Bookmark
- Highlight
- Report Inappropriate Content
Good Afternoon @theDIYedit
 Love it! and really am impressed with how solid it is. When i saw your frame going down to the floor I thought "Yep they are doing it right" Definently worth the effort.
I have wante dto do the same type of deal for years but am never game enough as I wonder what people will think of me sitting looking down at them (house is up higher then the road) Something about bench seats makes a room feel cosy and relaxing.
Thats a really nice professional job, and actually love that shelf space on the right! Even if you couldnt use it for drawers I think its better like it is!
Dave
Why join the Bunnings Workshop community?
Workshop is a friendly place to learn, get ideas and find inspiration for your home improvement projects