The Bunnings Workshop community can help with your home improvement projects.
- Bunnings Workshop
- >
- Featured Projects
- >
- Barn door for added privacy plus floatin...
Barn door for added privacy plus floating shelf
Share
- Subscribe to RSS Feed
- Mark as New
- Mark as Read
- Bookmark
- Subscribe
- Printer Friendly Page
- Report Inappropriate Content
Tasmanian Oak was used for a homemade barn door to create privacy between living and bedrooms, with extra timber utilised to make a floating shelf.

The project
We designed and built a barn door to provide more privacy in between our family living areas and other bedrooms. Also, to conserve energy during the seasons.
Our advice to others wanting to do the same thing is to plan and measure accurately. To be honest, I was very worried about the height of the door and how it would hang. Ron did an amazing job, making sure to accurately measure the area where the door was to be built. Once the materials were bought, we were able to remeasure where the railing would be built, so we knew exactly what the height of the door should be.
Tools and materials
Materials used in the project:
- DAR Tasmanian Oak 90mm x 19mm (2.4m)
- DAR Tasmanian Oak 30mm x 12mm (1.8m)
- Lining Board Panels White Pine Primed 140mm x 12mm (2.4m)
- Lockwood 3m Outland Barn Door Track Hardware Kit (Black)
- Rolltrak Matte Black Barn Door Raised Handles
- Dulux semi-gloss paint
- Monarch paint brushes and paint accessories
- Wood putty
- Wood glue (Gorilla Glue)
- Gap Filler (White)
- Dowel pin
- Nails
- Screws (100mm, 65mm)
- Custom-made bottom rail guide.
Tools used in the project:
- Fixing nail gun
- Air compressor
- Hammer
- Tape measure
- Pencil
- 45-degree triangle ruler
- Drop saw
- Jigsaw
- Spirit level set
- Cordless drill
- Impact drill
- Move It 590 x 490 x 126mm rectangular premier dolly.
All materials, paint and tools were from Bunnings.
Steps
Step 1
Planning and designing.
Ron measured the requirements for our barn door and sketched designs.


Step 2
Materials and construction.
We gathered all the materials and tools as per the list above.

We built frames and panels.

Step 3
Puttying and sanding.
We added putty to the areas where nails could be seen and to smooth out any imperfections of the wood. Gap filler was also used for any noticeable bigger gaps in between panels.

Then we sanded for a smoother finish in readiness for painting.

Step 4
Painting.
We then painted the door and roller rack guide with the Monarch paint brushes.


Step 5
Roller rack installation.
We installed the wood panel for the roller rack guide and then installed the roller rack.


Step 6
Installing door and custom-made bottom rail guide.
We used the Move It Dolly to first lift the barn door into position to attach to roller rack. From extra materials, we were able to build a custom-made bottom rail guide so that the barn door can remain in position when sliding right and left. Then we installed the barn door handles.

Step 7
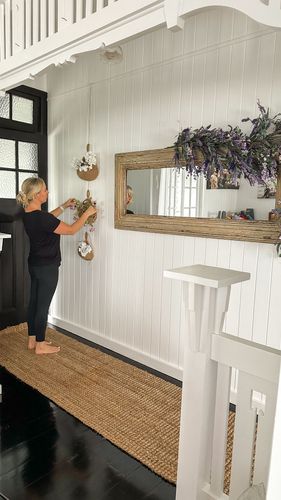
Floating wall shelf.
With extra wood we were able to create a floating shelf to add a little feature to our wall.


Hope this helps for those wanting to do something similar. Please feel free to ask any questions and/or message us directly.

Before and after

.jpg")
How to install a barn door
Along with adding charm to any living space, barn doors are also versatile statement pieces that can open up a room, section off a home office, or transform an awkward layout. Bunnings team has shared a step-by-step guide with video on How to install a barn door so you can add a barn door to your home.

More inspiration for your barn doors project
Workshop community member Rylie built these wide hardwood barn doors and can't wait to build more.

Community member peta was so happy with her husband's handmade barn doors that she wants him to replace all the interior doors.

Check out Barn door ideas for your home and 10 farmhouse style ideas for your home for more great ideas.
- Mark as Read
- Mark as New
- Bookmark
- Highlight
- Report Inappropriate Content
Good Morning @buildwithroneth
Now thats a nice looking door! Really like the reasoning behind putting the door in. I have been considering the same type of deal to partition the house so I dont need to heat/cool areas that arnt used as frequently.
Your explanation on how to mount the door and the rail was perfect. Definently bumps it into the realm of doable 
Thanks
Dave
- Mark as Read
- Mark as New
- Bookmark
- Highlight
- Report Inappropriate Content
Thank you @Dave-1
Apologies for the late reply. We've been overseas 🙂
Why join the Bunnings Workshop community?
Workshop is a friendly place to learn, get ideas and find inspiration for your home improvement projects