
The Bunnings Workshop community can help with your home improvement projects.
- Bunnings Workshop
- >
- Discussion
- >
- Garden
- >
- Wiggly pavers for sloped path in front y...
Wiggly pavers for sloped path in front yard
- Subscribe to RSS Feed
- Mark Topic as New
- Mark Topic as Read
- Float this Topic for Current User
- Bookmark
- Subscribe
- Mute
- Printer Friendly Page
Share
- Mark as New
- Bookmark
- Subscribe
- Mute
- Subscribe to RSS Feed
- Highlight
- Report Inappropriate Content
Wiggly pavers for sloped path in front yard

Since I was procrastinating about working on my patio I decided to finally put the next stage of my path into place.
I didnt have any gravel left over this time so shaved off the top level of grass/dirt and used it on the low points. Yeah I have had grass start to grow up between some of the pavers but that can be delt with and the best bit, no slipping and no bindies!
When I have laid pavers direct on clay I have never had an issue, they stay in place and really dont wander. This is the first time I have laid pavers on a steep slope tho so shall see how it goes.
One issue I had was marrying the new path to the old path. I thought it would be no problem, just a little adjustment... hahahahah not really so...
Materials
Wiggly Pavers (picke dthem up second hand)
Thats it...
Tools
Mallet
Flat bladded shovel
Large flat bladded screwdriver
Tamp Bar
Steps
Step 1
I had two issues to accommodate.
First was the Sewage point with that huge concrete lid.
Second was marrying the top of the path into the existing path (Where I ran out of pavers)
Thirdly I wanted to accommodate a ramp up to the first terrace where the tomatoes will be.

Where the path will be, I figured I would have more then enough pavers 197 of them ish I think (I bought them 4 months ago)

This is where I will have an offshoot ramp for the garden. I grow tomatoes along the Gabion wall.

Mmmm Marrying the old path into the new one, wasnt sure to start from the top or the bottom.

In the end I decided to work from the high side of the sewage access plug. It was something that couldn't be moved so thought that was the wisest.

I am actually really happy with how the existing path has held up.
Step 2
Time to shave the grass out and the clay. Also time to change the width, I was going to keep the same width as the upper path but ended up with a couple of extra pavers width added to it to make it look right

Id worked out the angle of the ramp (and since lost it) and pretty much used my eyesite to keep the slope as consistant as I could. I couldnt cut it too deep as the liquid amber trees roots would be an issue.

Scalping the grass. It was the most uneven path I had lol What a pain in leveling it (solid clay intermixed with grass)

Working to the curve of the concrete capping was interesting, I redid it three times as the angle wouldnt work.

Working from the top until I realised going downhill would be an issue with slippage as I put them in place.

So many pavers, I was burning through them incredibly fast.

The capping works in my favour as an immovable point the bricks butt up to.
Step 3
It was just a matter of brick after brick. It is amazing what you will do instead of stripping paint...

The wider width path really worked nicely

Now to merge the two angles and slopes together....

Almost but ????'s in my mind are starting to turn up..

Bugger... Easy Fix I told myself... Ended up redoing it three times and then there was still a bit of a gap for the merge. I decided to leave it for a month or so as there will be movement between the pavers.

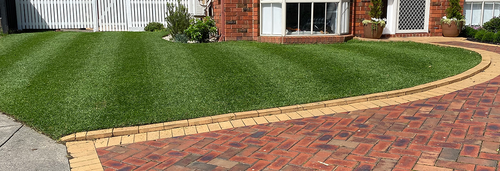
The view overall. We haven't had rain for awhile and it was feeling a little dry.

The "Merge" It will blend I hope.

Looks great and was beautiful to walk on. At the bottom you can see the bessa blocks are in the way.They will go eventually and the path will go to the boundary.

This was all I had left, not enough to go to the boundary so project is on pause again until I source some wiggly pavers.
Step 4
I was really happy with having a second paved access back to the front of the house. Think its been 4-5 years since the front path was removed at the start of sewage works.

Pretty nice, between the gabions one day will be timber lengths to better delineate the boundary. (also to keep doggos in the yard )

Just to show how much of the retaining wall will go.

The difference in height between the sewer cap and the first terrace. You can see the garden bed and gabion retaining wall on the left. Once those bessa blocks go this will be a smoothish ramp.
- Mark as New
- Bookmark
- Subscribe
- Mute
- Subscribe to RSS Feed
- Highlight
- Report Inappropriate Content
Re: Wiggly pavers for sloped path in front yard
Hi @Dave-1
Thank you for sharing your progress with the Wiggly pavers. I can't believe you relayed those tiles three times. It's hard enough with ordinary pavers, but doing it with interlocking pavers is liable to test your patience. My compliments to a very well laid sloped path.
I 'm looking forward to seeing the next set being placed in.
Eric
- Mark as New
- Bookmark
- Subscribe
- Mute
- Subscribe to RSS Feed
- Highlight
- Report Inappropriate Content
Re: Wiggly pavers for sloped path in front yard
Thank you @EricL
I like tetris  and really it felt like playing a big game of it.
Whenever I have a job that is going to be outside my normal level of knowledge (as in paving a slope) I find it sits in the "wait pile of jobs" until I bite the bullet and start it. This time around the slope was the easier job compared to stripping paint lol
Dave
Why join the Bunnings Workshop community?
Workshop is a friendly place to learn, get ideas and find inspiration for your home improvement projects
You might also like


We would love to help with your project.
Join the Bunnings Workshop community today to ask questions and get advice.