
The Bunnings Workshop community can help with your home improvement projects.
- Bunnings Workshop
- >
- Discussion
- >
- Garage and Shed
- >
- Garden tool bracket storage rack on bric...
Garden tool bracket storage rack on brick wall
- Subscribe to RSS Feed
- Mark Topic as New
- Mark Topic as Read
- Float this Topic for Current User
- Bookmark
- Subscribe
- Mute
- Printer Friendly Page
Share
- Mark as New
- Bookmark
- Subscribe
- Mute
- Subscribe to RSS Feed
- Highlight
- Report Inappropriate Content
Garden tool bracket storage rack on brick wall

I needed a convenient, strong, and dry storage solution for my garden tools and after stumbling across StorEase I knew its heavy-duty, rust-proof, highly customisable set up was exactly what I needed.
Materials


Tools
- 3mm masonry drill bit
- 8mm masonry drill bit
- Hammer drill
- Spirit level
- Pencil for marking
- Tape measure
I also already had a variety of tools to put up. These are the links to similar ones of the few I got from Bunnings but mine are older versions:
- Cyclone Half Moon Edger T-handle ($49.95)
- Fiskars 4 Prongs Xact Weed Puller ($74.95)
- Cyclone 150mm Auger Post Hole Digger ($84.95)


Steps
Step 1
I needed a space to store my garden tools and wanted them to be accessible enough that any could be collected, used, and returned to their rightful place without having to move various tools around. I had recently been playing with some pegboard ideas so thought that's where I would go with this. I calculated the dimensions available on the wall and mapped out the space on the grass to arrange the tools and see them laid out and organised.

Step 2
I then took a trip to Bunnings and had a look in the storage and shelving aisles. I needed something that would work for the heavy weight of some of my tools as well as remain rust-free over time (as the storage is on an exterior brick wall, under a deck on the Coffs Coast (lots of sub-tropical humid weather and close to the beach).
Rack-It wasn't flexible enough for my needs and Pinnacle/other pegboard systems just didn't seem like the right choice long-term.
I stumbled across the StorEase hooks and decided they were sufficiently heavy-duty for the project. Then when I discovered their rack system could be individually mounted and cut to size, I was sold. I stood in the aisle looking at the different types of hooks available and made a plan for which hooks I'd use for which tools.

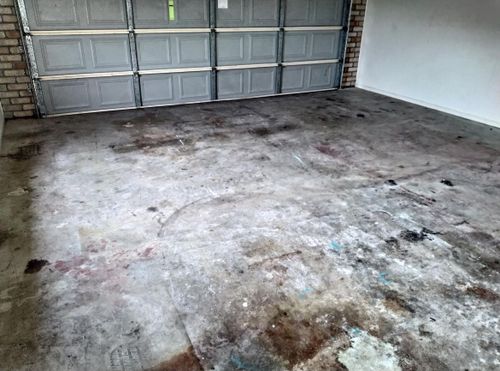
Step 3
My first step at home was to clean out the storage area, ready for work. Here is the before photo - what a mess!

Step 4
Once clean, I started installing one rack at a time. Each rack has 6 holes to mount with screws (two directly above each other at each end and two directly above one another. The racks come with really good quality screws and 8mm masonry wall plugs.
- Drilled a pilot hole with my masonry drill and 8mm bit for the provided plugs. Chose one of the top end drill holes of the rack first, then swivelled the rack on the wall to level it before marking a drill hole at the other end of the rack and fixing that.
- Once the two levelling screws were fixed I drilled the other 4 pilot holes with a 4mm masonry bit through the holes in the rack so they were correctly placed. It seems to be a more accurate method for me than marking the holes with a pencil, measuring them out, or taping them.
- I removed the two fixing screws and took the rack off the wall, then using the 8mm masonry bit, drilled larger pilot holes on top of the smaller ones I marked out earlier. Then fixed all 6 screws back in place.
- After the placing of each rack, I added in the hooks and tools for that section before placing and securing the next rack above it to ensure the rack had enough space between them to fit the tools. I started with the rack at the bottom right adding three above it, then the top left followed by the bottom left.
- I also added a bracket in the middle of the wall to mount my portable swivel wall fan for when I'm working in the area.
- The types of hooks and accessories I used are below.

Step 5
All four racks on the right side use two "Dual Utility Hooks"
- Bottom right houses three parts of my metal hammock frame.
- Second bottom right; the bottom hooks hold a crowbar and the top extended bars hold 3 different sized rakes and a Cyclone Hole Digger.
- Second top right holds a heavy shovel on the bottom hooks and a variety of tillers and weeders on the top racks. On this rack there are also three "Cradle Hooks". The Cradle Hooks sit lower than the bracket which means it allows for additional hanging space. They hold the remaining two posts for the metal hammock brackets.
- The top right houses a post shovel on the bottom hooks and the top racks hold a broom, soil leveller, and a hoe.
- The top left rack uses (from left)
- A dual utility hook housing a shovel and a pick
- A horizontal hook housing a mattock
- A 10cm double hook holding a fork
- A horizontal hook housing a Fiskars Weed Puller
- Three more double hooks with a large, short shovel; a cyclone grass edger, a long handled hoe
- The bottom left rack uses (from left)
- A wheelbarrow hook (I didn't end up wanting to hang the wheelbarrow so I kept the hook and used it for my kneeling mat
- A horizontal hook for my fruit picking attachment
- A 20cm double hook for my step stool and dustpan & brush
Step 6
It's important to note that the rails have a guideline of up to 100kg storage each but it does not specify the number of hooks used to satisfy that requirement. Many of my tools are my grandfather's and his were very good quality and heavy. The racks and hooks are incredibly secure and haven't slipped or bowed a millimetre since installation so I'm very satisfied.
Another important detail is installation of the hooks onto the brackets as the instructions do not provide clear directions. The hooks can be inserted anywhere along the length of the bracket. You slip the top tongue into the top groove at an angle, push the bottom middle tongue into the bottom groove with the two outside tongues at the bottom on the front of the groove, then pull the hook vertically downwards until you hear a click which locks them into position. It's important that the direction of pull is perpendicular to the rail otherwise the hook may twist sideways instead of locking. I found using small taps with a rubber mallet helped with alignment.
- Labels:
-
Organising
-
Tools and Materials
- Mark as New
- Bookmark
- Subscribe
- Mute
- Subscribe to RSS Feed
- Highlight
- Report Inappropriate Content
Re: StorEase Garden Tool Bracket Storage Rack on Brick Wall.
Hello @Emma-Lee
Thank you so much for sharing your tool bracket storage rack. It looks amazing and so well organized. It's good that you've taken a photo of the garden tool wall. There'll be no more guessing where the tools go to.
Again, thank you for sharing such a fantastic project.
Eric
- Mark as New
- Bookmark
- Subscribe
- Mute
- Subscribe to RSS Feed
- Highlight
- Report Inappropriate Content
Re: StorEase garden tool bracket storage rack on brick wall
Afternoon @Emma-Lee
Brilliant! I have all my yard tools standing next to my wall under the eaves of the house, I have considered a whole bunch of things to try but havnt got around to it. The StorEase hooks are perfect!
I love how you laid it out on the grass before hand  Tho wasnt sure what the Letter Abbreviations stood for until the end (I think they are forthe type of hooks?)
I think having your tools the way you have stored them make it more likely you will use the right tool instead of grabbing the closest thing to leaver or dig) , Well maybe thats just me
Dave
- Mark as New
- Bookmark
- Subscribe
- Mute
- Subscribe to RSS Feed
- Highlight
- Report Inappropriate Content
Re: StorEase garden tool bracket storage rack on brick wall
Thanks, @Dave-1!
Yes the letter abbreviations are the types of hook:
DU = Dual Utility
OH = Open Hook
DH = Double Hook
I was in store when I came across the product and found my photo and drew on it so I'd remember why I'd bought 8 dual utility hooks 😂 Obviously the final layout is slightly different than the original plan but I'm happy with it. StorEase also has baskets on hooks which makes me think I could use them for a rack underneath the potting bench for hand tools such as dibbers, hose attachments, trowels etc.
I completely agree about grabbing the first tool you see. If the mattock is buried under too many things I'll grab the hoe and before I know it I've bent the hoe and not made a dent to the job I'm trying to do 😅.
I cannot recommend the system highly enough! If you do end up using it and designing a system for your garden tools I'd love to see the end result 😄! It took me about half a day in total to put the brackets up but it would've been quicker if the chuck on my hammer drill wasn't starting to wear out and the drill bit kept slipping 🙄. That's my next job!
Emma-Lee
- Mark as New
- Bookmark
- Subscribe
- Mute
- Subscribe to RSS Feed
- Highlight
- Report Inappropriate Content
Re: StorEase Garden Tool Bracket Storage Rack on Brick Wall.
Thanks @EricL! Appreciate your encouragement 😄
- Mark as New
- Bookmark
- Subscribe
- Mute
- Subscribe to RSS Feed
- Highlight
- Report Inappropriate Content
Re: StorEase garden tool bracket storage rack on brick wall
Just a note if your chuck is slipping a bit an old trick Ive used is an old flathead screwdriver against the tooth of the chuck and a short sharp "tap" will lock it in place and then the reverse to unlock it. Note its not good for the chuck but you use and do what needs to be done.
I have bumped up the list of things to buy for the StorEase brackets
Dave
Why join the Bunnings Workshop community?
Workshop is a friendly place to learn, get ideas and find inspiration for your home improvement projects
You might also like


We would love to help with your project.
Join the Bunnings Workshop community today to ask questions and get advice.