
- Bunnings Workshop
- >
- Discussion
- >
- Garden
- >
- Re: How I built my vertical garden
How I built my vertical garden
- Subscribe to RSS Feed
- Mark Topic as New
- Mark Topic as Read
- Float this Topic for Current User
- Bookmark
- Subscribe
- Mute
- Printer Friendly Page
Share
- Mark as New
- Bookmark
- Subscribe
- Mute
- Subscribe to RSS Feed
- Highlight
- Report Inappropriate Content
How I built my vertical garden

I like vertical gardens. Problem is I don’t particularly like the plastic ones that are everywhere at the moment; and I can’t afford to pay someone to build me one. So I decided to make my own – here’s how I did it, screw ups (there were plenty) and all.
The wall
This wall is at the rear of our house, it’s part of an extension built sometime during the 80s. Since we recently built a new deck we’re spending more time outside and this plain wall has become a bit of an eyesore. It needed something.
The plan
Originally I wanted to use reinforced mesh for the structure – it looks great and it’s durable. But then I realised that I can’t weld and gaffer tape and cable ties aren’t exactly rock solid, so mesh was out.
Timber, however, is a different story. I ended up settling on a simple design – some shelves with 17 cm terracotta pots. Supporting the shelves I used some L brackets – these ones came in a nice satin black, which ties in perfectly with our fascia, guttering and window frames.

Measure up
‘Measure twice, cut once’ they say. I tried that but I still messed it up. Turns out the pot that I was basing my measurements on was a slightly different diameter to the bulk lot of pots (30 in all) that I bought. So, the 30 holes I cut with the jigsaw? Wrong. All wrong. I ended up having to make them all a bit bigger to accommodate the slightly larger pots. Lesson learnt.
So I started re-cutting the holes. It was at this point that I snapped my one and only jigsaw blade while re-cutting the first hole. No back up blade? Yep, another rookie mistake. I’m now an expert with a jigsaw and I have a big packet of blades so I’ll never run out mid-way through a job again.
You can check out the measurements I used (above), hopefully it saves you some time.

Oil vs Paint
Recently I oiled our deck and it turned out pretty good (just don’t mention the drips down the side). So I figured I’d oil the shelves – what could go wrong? Plenty.
First, I bought a cheap brush (mistake No.1), then I rushed the job (mistake No.2) and ended up with drips and some areas darker than others. It looked bad. I knew it looked bad because when I asked my wife what she thought she just kind of nodded, smiled and walked off. Never a good sign.
So to cover my gaffe I undercoated with an oil-based undercoat then carefully applied two coats of satin black paint with a roller. An expensive roller.
The finish was much better, check it out in the picture below.

A little support
Next step was to screw the brackets to the brick wall. I used a 6mm masonry bit, two to be exact – half way through drilling holes I managed to snap the first one. It’s still embedded about an inch in the wall. I also used some 5mm plastic spaghetti and some 75mm screws.
The trickiest part here was getting the brackets lined up in a straight line. To do this I clamped a couple of stakes either side of the first L bracket to ensure the one above it was held securely in place while I drilled the holes (see below).

Get it together
Now for the fun part. I attached the shelves with some 18mm screws, added a packer between the bracket and the shelf where necessary to get them perfectly horizontal, and dropped in the pots.
Done.
I still haven’t quite decided what to plant in the pots – any suggestions?

What’s the damage?
All up it cost around $200 (plants will cost more and I already had the paint). It took me a couple of days to build but no doubt you could do it much quicker by avoiding the mistakes I made!
Here’s what I used:
5mm plastic spaghetti
6mm masonry bit
75mm screws
18mm screws
Packers
235 x 19mm x 1.8m Premium Grade Dressed Pine x 5
150x175x25x6mm angle brackets x 6
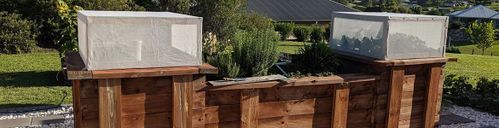
17 cm terracotta pot x 30
Undercoat
Black paint
Roller
- Mark as New
- Bookmark
- Subscribe
- Mute
- Subscribe to RSS Feed
- Highlight
- Report Inappropriate Content
Re: How I built my vertical garden
Hi @Anan, yes I did give a watering system some thought. But in the end I decided against installing one as I wanted to keep the look of the garden clean. The only downside to this is that regular watering is required to keep everying alive! Good luck with your vertical garden - a watering wand might help you to water in any hard-to-reach places.
- « Previous
- Next »
Why join the Bunnings Workshop community?
Workshop is a friendly place to learn, get ideas and find inspiration for your home improvement projects
You might also like


We would love to help with your project.
Join the Bunnings Workshop community today to ask questions and get advice.